Archives by date

You are browsing the site archives by date.

Make Real Progress, Try Periodization Training.

Make Real Progress, Try Periodization Training.

Hi friend, 

If you’ve been working out consistently but not seeing the progress you expect, you’re not alone. One of the biggest reasons we hit plateaus is, we do the same workouts over and over (and we incorrectly expect better results). 

This is where periodization training can save the day! 

Periodization is a structured way of planning our training so that our bodies keep progressing—without burning out. Instead of training the same way every week, we move through intentional phases that build strength, endurance, and power step-by-step.

Here is why it works:

  • We avoid plateaus by introducing fresh challenges
  • We reduce the risk of overtraining and injury
  • We get more out of our workouts with less guesswork
  • We stay motivated because every phase has a clear goal

Here is a simple beginner-friendly periodization plan that we use as a part of our training programs:

  • Weeks 1–4: Foundation Phase
    Focus on form, lighter weights, and building consistency.
  • Weeks 5–8: Strength Phase
    Add weight, lower reps, and challenge your muscles.
  • Weeks 9–12: Power or Endurance Phase
    Boost speed, explosiveness, or stamina depending on your goals.

By the end, you’ll have a solid, measurable path that keeps you progressing—not spinning your wheels.

If you’re ready to try periodization or want help building your first plan, just reply to this email. I’d be happy to walk you through it.

Let’s build your strongest self, one phase at a time.

High five! 

Coach Metra 
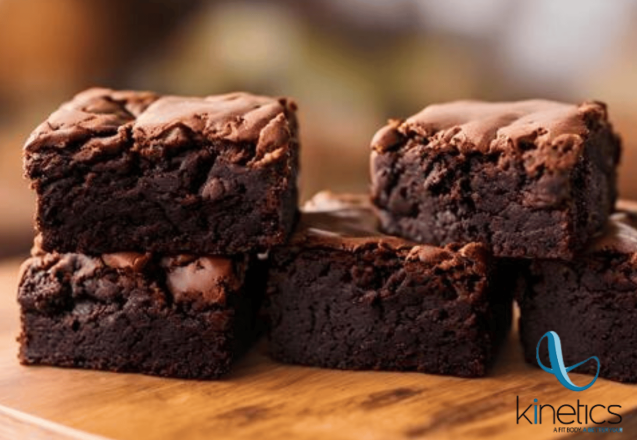

Chocolate Cloud with Sweet Potato and Lentils (Vegetarian)

Chocolate Cloud with Sweet Potato and Lentils (Vegetarian)

Courtesy of Kulinaria Recetas

This rich and airy chocolate cake is made with wholesome ingredients like lentils and sweet potato, creating a naturally moist texture and deep flavor. The dark chocolate and cocoa powder make it intensely chocolatey, while the whipped eggs give it a light, cloud-like texture. It’s a nourishing twist on a classic dessert that no one will guess includes legumes.

Ingredients

For one 8-inch / 20 cm round pan

4 large eggs

1 cup cooked lentils (well drained and cooled)

1 medium sweet potato, cooked and mashed

3 tablespoons honey (or sugar, if preferred)

4 tbsp dark chocolate, melted

2 tablespoons unsweetened cocoa powder

3tbsp g walnuts, chopped (optional)


Instructions

1- Preheat the oven to 170°C (340°F). Line or lightly grease an 8-inch (20 cm) round cake pan.

2- Cook the lentils until very tender, drain well, and let them cool completely.

3- Boil the sweet potato until soft, then mash until smooth and let it cool.

4- Melt the dark chocolate gently using a double boiler or microwave, stirring until smooth. Let it cool slightly.

5- Separate the eggs, placing the whites in one large bowl and the yolks in another.

6- In a blender or food processor, combine the cooked lentils, mashed sweet potato, egg yolks, honey, melted chocolate, and cocoa powder. Blend until completely smooth and creamy.

7- Beat the egg whites until stiff peaks form.

8- Gently fold the whipped egg whites into the chocolate mixture in batches, using slow, folding motions to keep as much air as possible in the batter.

9- Fold in the chopped walnuts, if using.

10- Pour the batter into the prepared pan and smooth the top.

11- Bake for about 40 minutes, or until a toothpick inserted into the center comes out clean.

12- Let the cake cool in the pan before removing. It will settle slightly as it cools.

Serve at room temperature. The texture is soft, moist, and delicately airy — like a chocolate cloud.


Nutrition facts per serving (1 slice, 100 g, 3.5 oz):

Calories 189 kcal, Fat 9.9 g, Saturated Fat 2.8 g, Carbohydrates 17.7 g, Dietary Fiber 3.5 g, Sugars 8.1 g, Protein 7.6 g, Sodium 43 mg, Calcium 32 mg, Iron 2.1 mg, Potassium 328 mg, Vitamin C 4.3 mg.


The Smarter Way to Snack

The Smarter Way to Snack

Snacks often get a bad rap.

Too many people think of snacking as “extra calories” or something that slows progress. But when done right, smart snacking can support your metabolism, stabilize energy, and improve workout performance.

The key isn’t snacking more — it’s snacking smarter.


Smart Snacking?

Long gaps between meals can backfire. When blood sugar drops too low, energy crashes, cravings spike, and the body becomes less efficient at using fuel.

Smart snacks help by:

  • Keeping blood sugar stable
  • Preventing overeating later in the day
  • Fueling workouts and recovery


How to design your smart snack?

Protein is the star: Protein requires more energy to digest than carbs or fats (a small metabolic bonus called the thermic effect of food). It also helps preserve muscle — and more muscle = higher metabolism.
Protein rich ideas: greek yogurt, hard-boiled eggs, soy products.

Pair protein with fiber: Fiber slows digestion, keeps you full longer, and prevents energy crashes. Fruit and veggies can also be part of a snack! 

Healthy fats = staying power: A little fat helps you stay satisfied and keeps hormones happy. Add mindful portions of nuts and seeds to your snacks.


Timing matters

Smart snacking isn’t random — it’s strategic. When you match the right fuel to your activity level and time of day, your body performs better.

  • Pre-workout: Protein + carbs for energy and muscle support
  • Post-workout: Protein to kick-start recovery
  • Mid-afternoon: Protein + fiber to avoid the afternoon crash

Listen to hunger cues and avoid emotional snacking. Snacks should support meals, not replace them.


The Power of Ready-to-Eat Snacks

The best snack is the one you actually HAVE WHEN HUNGER HITS.

When we’re unprepared, convenience wins — and that usually means low-nutrient foods.

So set yourself up for success:

  • Prep snacks ahead of time.
  • Always keep options in your gym bag, car, or desk.

Easy grab-and-go ideas:

  • Greek yogurt + berries
  • Apple + peanut butter
  • Hard-boiled eggs
  • Protein shake + banana
  • Pre-portioned mix with nuts and seeds
  • Edamame beans with sea salt


Train smart. Fuel smart. Feel the difference. 💪


Now it’s Your Turn 

This week, plan one smart snack per day.
Prep it, pack it, and eat it intentionally — not reactively.


Try this Roasted Edamame with Sea Sal to kick-off:

Courtesy of The Kitchn

– 2 cups (aprox. 16 oz) of frozen shelled edamame
– 2 teaspoons extra-virgin olive oil
– 1 teaspoon sea salt
– 1/2 teaspoon freshly-cracked black pepper (or 1-2 teaspoons alternate seasoning)

  1. If you have time, thaw the edamame for an hour or so in a strainer over a bowl (to catch the melting liquid) before baking. This will reduce the roasting time.
  2. Preheat the oven to 375°F.
  3. If not thawed beforehand, pour the edamame in a strainer and run under warm water for a few seconds to melt any ice crystals. Spread the edamame on a clean dish towel and pat gently with another dish towel to dry them as much as possible.
  4. In a mixing bowl, toss the edamame with the olive oil, salt, and pepper (or other seasonings).
  5. Spread the edamame in a single layer on a sheet pan and roast for 30-40 minutes. Stir every 10 minutes and watch for the edamame to begin puffing and turning golden-brown. Their color will darken, the exterior will be dry, and you’ll hear them “singing” as steam escapes from inside the bean.
  6. Remove the pan from the oven and transfer the roasted edamame to a serving bowl.


Nutritional Facts (per serving: 1/2 cup ~85 g, ~3 oz):
Calories 150, Total Fat 7.5g, Saturated Fat 1g, Trans Fat 0g, Cholesterol 0mg, Sodium 300mg, Total Carbohydrate 9g, Dietary Fiber 5g, Sugars 2g, Protein 11g, Vitamin D 0mcg, Calcium 65mg, Iron 2.2mg, Potassium 450mg


Call to Action 

Nutrition is the “hidden” part of your fitness journey. If you’re working hard in the studio but feel like your diet is holding you back, reply to this email or text us at 732-314-4086! The team at Kinetics NJ is ready to help you fine-tune your fuel so you can see the results you’ve been working for.


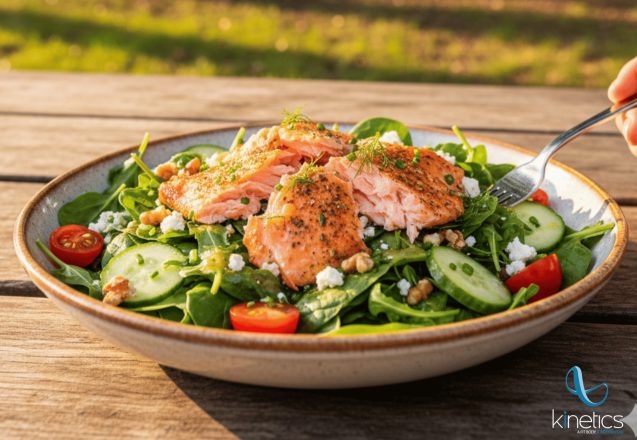
Sunshine Salmon & Spinach Salad

Sunshine Salmon & Spinach Salad

This recipe combines vitamin D-rich salmon with nutrient-dense greens, healthy fats for absorption, and a bright, citrusy dressing to capture that feeling of being outdoors.

Ingredients

For the Salad:

4 cups mixed greens (spinach, arugula, or a spring mix)

1 cooked salmon fillet (baked or grilled)

1/2 cup cucumber, sliced or diced

1/2 cup cherry tomatoes, halved

1/4 cup chopped walnuts or slivered almonds (optional)


For the Lemon-Herb Vinaigrette:

3 tablespoons olive oil

2 tablespoons fresh lemon juice

1 teaspoon Dijon mustard

1 teaspoon honey or maple syrup (optional, for balance)

1/2 teaspoon dried dill or fresh herbs like parsley/chives, chopped

Salt and black pepper to taste


Instructions

  1. In a small bowl or jar, whisk together the olive oil, lemon juice, Dijon mustard, honey/maple syrup (if using), and dill/herbs. Season with salt and pepper. Set aside.
  2. In a large bowl, combine the mixed greens, cucumber, and tomatoes.
  3. Gently flake the cooked salmon over the greens. Sprinkle with walnuts/almonds (if used).
  4. Dress and serve.


Try the jar version 


The perfect grab-and-go meal for a hike, park visit, or outdoor lunch:


  1. Mix the dressing in the bottom of your glass jar.
  2. Layer the rest of the ingredients in order: cucumber, tomatoes, salmon, greens and nuts.
  3. When you are ready to eat, simply shake the jar vigorously until the dressing has coated all the ingredients.


Enjoy this meal outside for the ultimate “mind and body” reset!


Shift your mindset: movement is a lifestyle, not a task

Shift your mindset: movement is a lifestyle, not a task

When we think about being more active, we often picture gym clothes and hour-long workouts. 

But the truth is, an active lifestyle isn’t built in one big session — it’s built through small choices repeated every day.

Movement doesn’t only live in the gym. It lives in how you commute, how you shop, how you clean your house, and how you move through your day.

The convenience trap

Today, technology is designed to make our lives easier, faster, and more comfortable. Food arrives at our door with a few taps. Elevators replace stairs. Cars replace walking. Smart devices do tasks we once did ourselves.

We spend the day finding ways to minimize effort, only to later make the effort to fit our workout in our busy schedule.

While convenience isn’t bad, the unintended side effect is that many daily movement opportunities quietly disappear. The challenge isn’t to reject technology — it’s to be intentional about CHOOSING MOVEMENT WHEN EFFORT IS OPTIONAL.

In a world built for comfort, CHOOSING MOVEMENT BECOMES A POWERFUL ACT OF SELF-CARE.

Small Habits, Big Movement 

Our bodies were designed to move often, in different ways, and with purpose. 

When movement feels like a chore, consistency disappears. When movement is woven into daily life, it becomes effortless and sustainable.

Instead of asking, “When will I work out?” try asking,
“Where can I move more today?”


It’s your turn

Everyday swaps that add up

Small changes may feel insignificant in the moment, but over weeks and months, they create powerful results.

  • Ride your bike or walk instead of driving when distances are short.
  • Choose the stairs over the elevator.
  • Go to the store instead of shopping online.
  • Park farther away and enjoy the extra steps..

Turn chores into functional training

Household tasks are a hidden goldmine for movement when done with intention.

  • Squat instead of bending when picking things up.
  • Carry groceries or laundry like farmer’s carries.
  • Engage your core while cutting hard veggies, vacuuming or mopping.
  • Reach, rotate, and step with control during yard work or cleaning.

Pick one or two habits and give them a try.
Start small. Stay consistent.


Call to action

At Kinetics NJ, we help people stay strong in a world that asks them to sit more and move less. If you want support building an active lifestyle that fits your real life, reply to this email or call 732-314-3086 and our team will help you create a plan that keeps you moving.


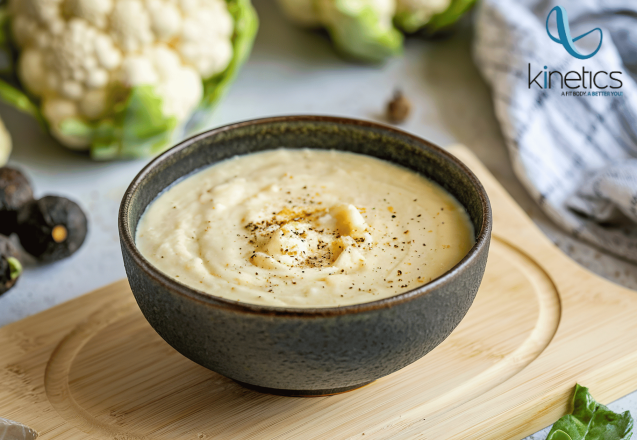
Chilled Coconut–Cauliflower Soup (Vegetarian)

Chilled Coconut–Cauliflower Soup (Vegetarian)

Courtesy of Ale Temporini

This refreshing cold soup is light, creamy, and packed with subtle sweetness and savory depth—perfect for hot days when you want something nourishing but not heavy. Made with simple vegetables, coconut milk, and a touch of cream cheese, it blends into a silky, elegant soup that tastes even better well chilled.


Ingredients

  • 1 apple, peeled and diced
  • 1 small cauliflower, cut into small florets
  • 1 onion, diced
  • 2 garlic cloves, minced
  • 1 leek (white part only), sliced
  • Salt and black pepper, to taste
  • 1 tablespoon olive oil (or other neutral oil)
  • 1 cup coconut milk
  • 1 tablespoon whipped cream cheese
  • 1½ cups water


Instructions

  1. Heat the olive oil in a large pan over medium heat.
  2. Add the apple, cauliflower, onion, garlic, and leek. Sauté with the pan covered, stirring occasionally, until the vegetables are tender but still slightly firm.
  3. Season with salt and black pepper.
  4. Add the coconut milk and water, stirring to combine. Cook for 2–3 more minutes.
  5. Transfer everything to a blender or food processor. Add the whipped cream cheese and blend until completely smooth and creamy.
  6. Pour the soup into a large bowl and let it cool to room temperature.
  7. Refrigerate for at least 1–2 hours, until well chilled.
  8. Serve cold, adjusting seasoning if needed.

Optional garnish: drizzle of olive oil, fresh herbs, or a sprinkle of black pepper before serving.


Nutrition facts per serving (1 bowl, 300 g, 10.6 oz):

Calories 227 kcal, Fat 16.6 g, Saturated Fat 11.8 g, Carbohydrates 20.4 g, Dietary Fiber 4.0 g, Sugars 9.7 g, Protein 4.3 g, Sodium 56 mg, Calcium 59 mg, Iron 1.8 mg, Potassium 592 mg, Vitamin C 59.1 mg.


Not making progress? - This might be why

Not making progress? – This might be why

How to train hard and smart. The power of progressive overload

Getting stronger isn’t about doing more just for the sake of doing more. It’s about doing things a little better, a little harder, and a little smarter over time.

That’s where progressive overload comes in—the foundational principle behind strength, muscle growth, and long-term performance.


What is progressive overload?

Progressive overload means gradually increasing the demands placed on your body so it has a reason to adapt. When muscles are challenged slightly beyond what they’re used to, they respond by getting stronger, more efficient, and more resilient.

Without progression, the body adapts—and then plateaus.


Why your body needs it

When a workout becomes familiar, it requires less effort and produces fewer results. Progressive overload keeps the stimulus fresh and effective by:

  • Building strength and muscle safely over time
  • Improving bone density and joint resilience
  • Boosting confidence and motivation through measurable progress
  • Reducing injury risk compared to random or excessive jumps in intensity

This is how we train hard and train smart.


Smart ways to apply progressive overload

Progress doesn’t always mean adding more weight. There are many effective—and safer—ways to progress:

  • More weight
    Gradually increase resistance once current loads feel controlled and strong.
  • More reps
    Keep the same weight, but perform more repetitions with good form.
  • More sets
    Add an extra round to increase total training volume.
  • Better form and control
    Slower tempo, better range of motion, and improved technique increase challenge without increasing load.
  • Reduced rest time
    Shortening rest periods increases intensity and cardiovascular demand.

Small changes add up. Progress is built one intentional step at a time.


Progression ≠ rushing

More is not always better. Pushing too hard, too fast can lead to fatigue, stalled progress, or injury. The goal is consistent, sustainable improvement, not burnout.

At Kinetics, we focus on meeting your body where it is—and guiding it forward with purpose.


Here’s your challenge

This week, choose one exercise and progress it in just one way:

  • Add 1–2 reps
  • Improve depth or control
  • Reduce rest slightly
  • Increase weight only if form stays solid


Call to action

Not sure how—or when—to push a little more? That’s what coaching is for.

Reply to this email or reach out to us after your next class at Kinetics. We’ll help you build a program that challenges your body, respects your recovery, and supports long-term strength—so you can train hard, train smart, and keep moving forward.


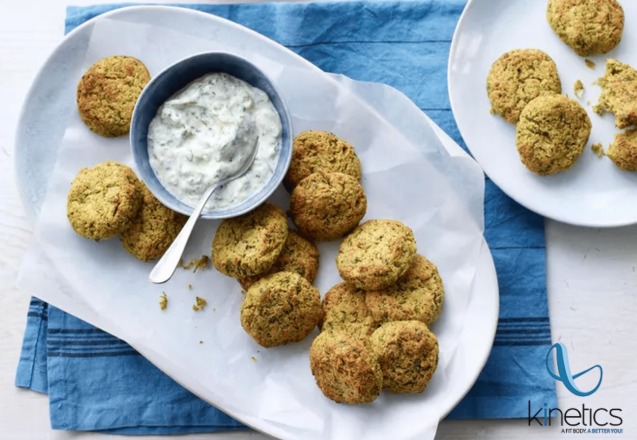
Healthy Baked Falafel (Vegan)

Healthy Baked Falafel (Vegan)

Courtesy of Paulina Cocina

Made with chickpeas, herbs, and spices, these golden bites are crisp on the outside and tender inside — perfect for serving with salads, pita, or your favorite sauce. 


Ingredients (makes about 12 falafel)

  • 1 cup cooked chickpeas (you can use canned, drained and rinsed) 
  • 1 green onion (scallion), roughly chopped 
  • 1 small handful fresh cilantro, roughly chopped 
  • 1 clove garlic, minced 
  • ½ cup all-purpose flour 
  • Juice of 1 lemon 
  • 1 pinch ground cumin 
  • Salt and pepper, to taste 
  • Bread crumbs, for coating 
  • Olive oil spray (or a light drizzle of olive oil)


Instructions

  1. Set your oven to 400°F (200°C) and line a baking sheet with parchment paper or lightly grease it.
  2. Mash the chickpeas with a fork, potato masher or blender, until mostly broken down but still slightly chunky. 
  3. Add the chopped green onion, cilantro, minced garlic, cumin, salt, and pepper to the bowl. Mix well to combine. 
  4. Pour in the lemon juice and flour. Stir and then use your hands to knead gently until a cohesive dough forms. If it feels too wet, add a little more flour. 
  5. Form the mixture into small balls (about the size of a golf ball) and flat them slightly. 
  6. Press each gently into bread crumbs to coat. 
  7. Place the falafel on the prepared baking sheet. Lightly spray or brush the tops with olive oil — this helps them turn golden in the oven. Bake for 18–22 minutes, flipping halfway, until crisp and golden brown.
  8. Serve warm with tahini sauce, yogurt sauce, or tucked into pita with fresh veggies.


Enjoy your healthier homemade falafel! 

Nutrition facts per serving (5 falafels, ~150 g, ~5.2 oz):

Calories 319 kcal, Fat 7.2 g, Saturated Fat 1.0 g, Carbohydrates 52.6 g, Dietary Fiber 7.0 g, Sugars 5.1 g, Protein 11.2 g, Sodium 142 mg, Calcium 79 mg, Iron 4.1 mg, Potassium 319 mg, Vitamin C 10.8 mg.