Nutrition

Quinoa, Tofu & Sundried Tomatoes Salad (Vegetarian/Vegan)

Quinoa, Tofu & Sundried Tomatoes Salad (Vegetarian/Vegan)

Courtesy of Maite

This vibrant, filling, protein-rich salad brings together fluffy quinoa, golden sautéed tofu, tender spinach, and bursts of flavor from dried tomatoes and crunchy pumpkin seeds. It’s satisfying enough to enjoy as a main dish, yet light and fresh—perfect for meal prep, lunch bowls, or a simple weeknight dinner.

Ingredients

  • 1 cup dry quinoa
  • 2 cups water or vegetable broth
  • 1 block (14 oz / 400 g) firm or extra-firm tofu, pressed and cubed
  • 2 Tbsp olive oil, divided
  • 2 cloves garlic, minced
  • ½ cup dried tomatoes (sun-dried or oven-dried), hydrated and chopped
  • 4 cups fresh spinach, roughly chopped
  • ¼ cup pumpkin seeds
  • ¼ cup almonds
  • 1 Tbsp honey (or agave or maple syrup for vegan option)
  • 1 Tbsp lemon juice or apple cider vinegar
  • 1 tsp Dijon mustard
  • Salt and black pepper, to taste
  • Optional: red pepper flakes, fresh herbs (parsley or basil), or a drizzle of tahini


Instructions

1- Hydrate the dried tomatoes in hot (not boiling) water for about 20 to 30 minutes.

2- Meanwhile, rinse the quinoa under cold water, until the water runs clear.

3- Combine the quinoa with water in a 2:1 ratio, bring to a boil, then cover and simmer on low for about 15 minutes until the water is absorbed and the grains are fluffy.

4- Heat 1 tablespoon of olive oil in a large skillet over medium heat. Add the tofu cubes and cook for 6–8 minutes, turning occasionally, until golden on all sides. Add the garlic, merken, and honey, stir well, and cook for 1 more minute. Remove from heat.

5- In a large bowl, whisk together the remaining 1 tablespoon olive oil, lemon juice, Dijon mustard, salt, and black pepper.

6- In the bowl, combine the cooked quinoa, tofu and dried tomatoes still warm, with the spinach, almonds and pumpkin seeds.

7- Toss gently until everything is well combined and the spinach slightly wilts.

8- Taste and adjust seasoning, adding extra lemon juice, salt, or pepper as needed.

9- Serve warm or chilled, topped with optional herbs, red pepper flakes, or a light drizzle of tahini if desired.


Nutrition facts per serving (1 bowl, ~300 g, ~10.5 oz):
Calories 404 kcal, Fat 22.3 g, Saturated Fat 3.5 g, Carbohydrates 38.6 g, Dietary Fiber 7.4 g, Sugars 8.0 g, Protein 16.7 g, Sodium 349 mg, Calcium 151 mg, Iron 4.5 mg, Potassium 714 mg, Vitamin C 23 mg.


Tuna and Pumpkin Burgers (Fish)

Tuna and Pumpkin Burgers (Fish)

Courtesy of Paulina Cocina

These tuna and pumpkin burgers are a quick, simple, and nutritious meal that comes together with just a few pantry ingredients. The pumpkin adds moisture and a subtle sweetness, while the tuna provides protein and savory flavor. They’re perfect for a light lunch or dinner and cook in just a few minutes in a pan.

Ingredients
(Makes 4–5 burgers)

  • 2 cans tuna, drained
  • 2 tablespoons cooked pumpkin, mashed
  • 1 egg white
  • 1 tablespoon chopped parsley
  • 1 garlic clove, finely minced
  • 2 tablespoons breadcrumbs (add more if needed)
  • 1 tablespoon sesame seeds
  • Ground black pepper, to taste
  • Oil, for cooking

Instructions

  1. In a bowl, mash the drained tuna with a fork until it is fully broken apart.
  2. Add the chopped parsley and minced garlic. Then mix in the mashed pumpkin, sesame seeds, and black pepper. Do not add salt, as canned tuna already contains enough salt and the burgers may become too salty.
  3. Add the egg white and breadcrumbs and mix everything together until it forms a soft dough. The mixture should be firm enough to handle; if it feels too soft, add a little more breadcrumbs.
  4. Form the mixture into balls and gently flatten them to shape the burgers. They do not need to be very thin.
  5. Heat a pan over medium heat with a little oil and cook the burgers until golden brown on both sides.

They pair beautifully with a high-fiber side like a cucumber and tomato salad and a half-cup of quinoa to round out the plate.

Nutrition facts per serving (2 burgers, 150 g, 5.3 oz):

Calories 264 kcal, Fat 10.2 g, Saturated Fat 1.6 g, Carbohydrates 8.8 g, Dietary Fiber 1.1 g, Sugars 0.9 g, Protein 33.2 g, Sodium 460 mg, Calcium 58 mg, Iron 2.2 mg, Potassium 305 mg, Vitamin C 1.3 mg.


Raising Strong, Healthy Eaters (Without the Food Fights)

Raising Strong, Healthy Eaters (Without the Food Fights)

Healthy habits start at home. And when it comes to nutrition, kids aren’t born knowing how to eat well…they learn it from us. Getting your children interested in healthy eating doesn’t require perfection, strict rules, or turning your kitchen into a classroom. It’s about curiosity, connection, and consistency.

Teach Them How to Build a Healthy Meal

Instead of labeling foods as “good” or “bad,” help kids understand balance. A simple framework works wonders:

  • Protein for strength and growth
  • Colorful veggies for vitamins and minerals
  • Whole grains or healthy carbs for energy
  • Healthy fats for brain power

When kids help assemble their own plate—choosing a protein, adding color, picking a carb—they feel empowered, not controlled. Ownership builds confidence, and confidence builds habits.

Let Them Choose One New Veggie

Next time you’re at the grocery store, give your child a mission:
👉 Pick one new vegetable we’ve never tried before.

No pressure to love it. No pressure to finish it. Just explore it. Wash it, cut it, cook it together. Even if they only take one bite, that’s a win. Repeated exposure (not force) is how tastes evolve.

Cook Together = Connect Together

Cooking is more than food prep—it’s quality time. Chopping, stirring, tasting, and laughing in the kitchen creates memories and life skills. Kids who cook are more likely to:

  • Try new foods
  • Eat more fruits and vegetables
  • Develop a healthier relationship with food

Bonus: you’re teaching them a skill they’ll use for life.

Build Habits, Not Rules

Healthy eating isn’t about being perfect—it’s about being consistent. When kids see regular meals, shared family time, and balanced choices modeled day after day, it becomes normal. These small, repeated actions compound into lifelong habits.


Your Challenge This Week

On your next grocery trip, let your child pick one new vegetable they’ve never tried before. Bring it home and prepare a simple meal with it together—no pressure, just curiosity and fun.


Call to Action

At Kinetics, we believe fitness goes beyond workouts—it’s about building strong habits for the whole family. If you want support creating a balanced approach to movement, nutrition, and family wellness, reply to this email or send us a text at 732-314-3086 and our team will help you build a plan that works for your real life.

Strong kids. Strong families. Strong community. 💪


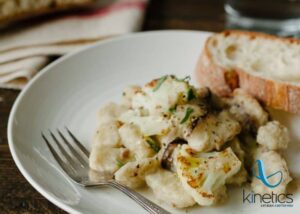
Oven-Roasted Cabbage with Hummus

Oven-Roasted Cabbage with Hummus

Courtesy of Kulinaria Recetas

A simple yet impressive vegetarian dish: thick slices of cabbage roasted to caramelized perfection, paired with a bright, garlicky hummus. This makes a delicious main, side, or part of a mezze-style spread. 

Ingredients

For the roasted cabbage

  • ½ large cabbage (cut into thick slices) 
  • Olive oil, to taste (about 3–4 tbsp) 
  • Juice of ½ lemon
  • 2 tbsp Balsamic vinegar (for drizzling) 
  • 1 tbsp Mustard 
  • 1 tsp Maple syrup or Honey
  • 3 garlic cloves
  • Herbs & spices: smoked paprika, ground red pepper, thyme 
  • Fresh parsley, chopped (for garnish) 

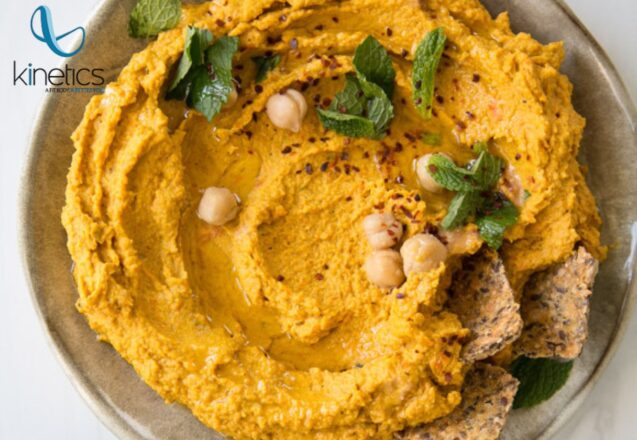
For the hummus

  • About 1½ cups cooked chickpeas (approximately 1 can) 
  • Olive oil (to blend and for roasting) 
  • Juice of ½ lemon (plus extra from above for cabbage) 
  • Salt & pepper, to taste 


Instructions

  1. Preheat your oven to 200 °C (390 °F). Wash and cut the cabbage into slices about 2 cm thick. 
  2. In a bowl, mix olive oil, a splash of balsamic vinegar, mustard, juice of ½ lemon, a teaspoon of honey, chopped parsley, smoked paprika, chili, thyme, salt, and pepper. Add halved garlic clove. 
  3. Place the cabbage slices in a baking dish. Brush them generously with the marinade. Season with salt and pepper. Roast in the oven for about 20 minutes, until the edges begin to brown and the cabbage is tender. 
  4. While the cabbage roasts, add cooked chickpeas, olive oil, lemon juice, garlic from the marinade, salt and pepper to a food processor. Blend until smooth. Adjust seasoning and add a bit of water if needed to reach your desired consistency. 
  5. Once the cabbage has roasted initially, spread some of the hummus mixture on top or alongside and return to the oven for a few more minutes to meld flavors and warm through. 
  6. On a platter, spread a layer of hummus, arrange the roasted cabbage on top, garnish with parsley, an extra squeeze of lemon, and a drizzle of olive oil or balsamic vinegar. Enjoy warm!


Nutrition facts per serving (300 g or 10.6 oz)

Calories 322 kcal, Fat 21.4 g, Saturated Fat 3.1 g, Carbohydrates 28.5 g, Dietary Fiber 9.4 g, Sugars 8.2 g, Protein 9.1 g, Sodium 415 mg, Calcium 112 mg, Iron 3.2 mg, Potassium 585 mg, Vitamin C 62.4 mg.


Crispy Eggplant Stacks

Crispy Eggplant Stacks

These crispy, layered eggplant stacks are a fun and satisfying way to enjoy vegetables. Filled with juicy tomato, melty cheese, and savory turkey, then coated in a crunchy crust, they’re perfect as a light main dish or hearty side. You can make them in the air fryer for extra crispiness or bake them in the oven.


Ingredients

2 medium eggplants

Salt, to taste

Olive oil (spray or drizzle)

1 tomato, sliced

Mozzarella cheese (sliced)

Turkey breast slices

2 eggs, beaten

Breadcrumbs, Corn grits, or Cornflakes, crushed

Grated Parmesan cheese


Instructions

1- Slice the eggplants into medium-thick rounds. Sprinkle with salt and let them rest for about 15–20 minutes to release excess moisture. Pat dry with paper towels.

2- Heat a lightly oiled skillet over medium heat and cook the eggplant slices for a couple of minutes on each side, just until slightly tender. Remove and set aside.

3- Assemble the layers: one slice of eggplant, a slice of tomato, a slice of cheese, another slice of eggplant, a slice of turkey breast, and finish with a final slice of eggplant.

4- Dip each stack into the beaten eggs, making sure it is well coated.

5- In a shallow bowl, mix the breadcrumbs, corn grits or crushed cornflakes with grated Parmesan. Coat each eggplant stack evenly in the mixture, pressing gently so it adheres.

6- Lightly spray or drizzle the coated stacks with olive oil.

7- Cook in the air fryer at 375°F (190°C) for 12 minutes, flipping during the last 4 minutes to crisp both sides evenly.
Alternatively, bake in a preheated oven at 400°F (200°C) for about 15 minutes, or until golden and crispy.


Nutrition facts per serving (2 eggplant stacks, approximately 300 g, 10.6 oz):

Calories 360 kcal, Fat 17.2 g, Saturated Fat 6.2 g, Carbohydrates 28.6 g, Dietary Fiber 7.8 g, Sugars 9.3 g, Protein 25.0 g, Sodium 741 mg, Calcium 330 mg, Iron 2.8 mg, Potassium 1,055 mg, Vitamin C 14.5 mg.


Easy Ways to Save Money

Easy Ways to Save Money

Studies show that the average household wastes hundreds of dollars on spoiled groceries every year. That spoilage equals money that could be used on vacations, concerts or training sessions at Kinetics!

Consider this, a simple yet valuable task like organizing our refrigerators and cabinets could save us lots of money.

When our refrigerators and cabinets are not organized we buy duplicates of foods, making it more likely that the old food will go bad. This is a waste of money.

When foods are not stored in our refrigerators at the proper temperatures we don’t maintain the foods freshness and the food spoils faster than it should. This is a waste of money.

The solution, increase the performance of our refrigerators and cabinets. Place food where it lives longest and stays safest. This means understanding the temperature zones of your refrigerator and the enemies of your dry goods. Here is how we can do it:

Our refrigerators

Our fridges are not one single temperature:

  • Top shelf 🡪Ready-to-eat: The temperature here is the most stable and warmest. Use it for items that are already cooked or require minimal chilling like prepared foods, cooked leftovers and herbs.
  • Middle Shelf 🡪 Dairy & Eggs: This area maintains a consistent, moderate temperature. Optimal for storing eggs and dairy.
  • Bottom Shelf 🡪 Raw Meat & Fish: This is the coldest part of your fridge and is mandatory for safety. Also, keeping raw food in the bottom shelf minimizes the risk of any juices dripping onto items below. Keep here raw poultry, meat, and fish on a plate or in a container to prevent dripping.
  • The Door 🡪 Condiments & Drinks: The door experiences the most temperature fluctuation when we open and close the fridge, so save it for foods with natural preservatives like jams, condiments (mustard, ketchup, hot sauce), and shelf-stable drinks.
  • Fruits & Veggies:
    – For produce that wilt easily (like kale, spinach, broccoli) the moisture helps them last longer. After washing and drying, keep them in a hermetic container or bag.
    For produce that emits ethylene gas and speeds up ripening (like bananas, apples, avocados, peaches), keep them separate from non-ethylene producers!

Our cabinets

Our dry goods should be hermetically sealed to prevent them from adsorbing humidity, losing crispiness or going stale. This will also help avoid pests.

Oils and spices

Store them away from the stove or direct sunlight. Heat exposure accelerates staling, degrades the quality and flavors of oils and reduces the potency of your spices.

Embrace the FIFO Rule

First-In, First-Out: When stocking groceries, always bring the oldest items (closest to their date) to the front and put new items in the back. This ensures you use everything before it spoils.


Try these 3 additional tips to GET MORE from your kitchen this week

1. Store your produce ready-to-eat: Wash and dry your veggies before storing them. This way they will not only last longer in your fridge, but also you are far more likely to grab a fruit or prepare a fast healthy snack if they are ready-to-eat and visible.

2. “Use me!” meal prep: If you find items that are approaching their expiration date or need to be used immediately, prepare them in the moment to have them ready to use in your next meal. Chop veggies or steam them before-hand and store them in a container in the front of the shelf. Use these in your next meal instead of preparing something else from scratch.

3. Weekly “Inventory Day”: Every Sunday, before grocery shopping, do a 5-minute inventory of your fridge and pantry. Use this list to plan your meals and shopping list, ensuring you are prioritizing ingredients that need to be used up and avoid buying stuff you already have.


If you’re ready to begin your total body and kitchen transformation, reach out to us. You are one call or email away from your dreamed body and lifestyle!


Lentil & Beef Gratin

Lentil & Beef Gratin

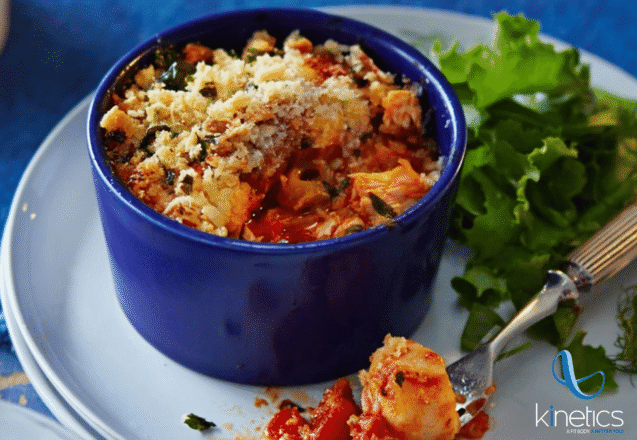
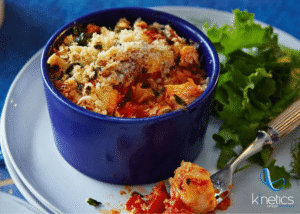
This hearty recipe combines the earthy flavors of lentils and tender shredded beef with a creamy, cheesy mashed potato topping. It is a comforting, protein-packed meal that is perfect for sharing with family and friends on a cozy evening.

Ingredients

2 cups cooked lentils

1 lb cooked shredded beef or grounded meat

1 cup grated carrots

1 small white onion, finely chopped

2 cloves garlic, minced

2 medium tomatoes, blended or finely grated

1 tbsp vegetable oil

Salt and pepper to taste

2 cups prepared mashed potatoes

1 cup of prepared mashed butternut squash

½ cup shredded cheese

Instructions

  1. Preheat your oven to 390°F (200°C). 
  2. In a large skillet, heat the vegetable oil over medium heat and sauté the chopped onion and minced garlic until the onion becomes translucent and fragrant. 
  3. Add the shredded beef and cook until the meat is almost done
  4. Incorporate the grated carrots, blended tomatoes and the cooked lentils, stirring well to combine.
  5. Simmer for a few minutes until the sauce thickens slightly and the flavors meld. 
  6. Season the mixture with salt and pepper to taste. 
  7. Pour the beef and lentil mixture into a glass baking dish or oven-proof casserole, spreading it out into an even layer. 
  8. In a separate bowl, mix the prepared mashed potatoes and butternut squash. Then spread this topping carefully over the lentil and meat base. 
  9. Sprinkle the cheese over the top and bake for approximately 10 minutes, or until the cheese is melted and starts to turn a beautiful golden brown. 
  10. Serve hot and enjoy with a side salad.


Nutrition facts per serving (300 g, 10.5 oz):

Calories 341 kcal, Fat 13.2 g, Carbohydrates 28.7 g, Dietary Fiber 6.7 g, Sugars 4.6 g, Protein 27.9 g, Sodium 439 mg.


Sweet Potato Snack Fries

Sweet Potato Snack Fries

Ingredients

  • 1 medium sweet potato
  • 1 tbsp olive oil
  • ½ tsp paprika
  • ¼ tsp garlic powder
  • Salt to taste

Instructions

  1. Cut sweet potato into thin fries.
  2. Toss with oil and seasoning.
  3. Bake at 425°F (220°C) for 20–25 minutes.

Nutrition

Calories: ~150 kcal, Fiber: 4 g, Vitamin A: High


Chocolate Cloud with Sweet Potato and Lentils (Vegetarian)

Chocolate Cloud with Sweet Potato and Lentils (Vegetarian)

Courtesy of Kulinaria Recetas

This rich and airy chocolate cake is made with wholesome ingredients like lentils and sweet potato, creating a naturally moist texture and deep flavor. The dark chocolate and cocoa powder make it intensely chocolatey, while the whipped eggs give it a light, cloud-like texture. It’s a nourishing twist on a classic dessert that no one will guess includes legumes.

Ingredients

For one 8-inch / 20 cm round pan

4 large eggs

1 cup cooked lentils (well drained and cooled)

1 medium sweet potato, cooked and mashed

3 tablespoons honey (or sugar, if preferred)

4 tbsp dark chocolate, melted

2 tablespoons unsweetened cocoa powder

3tbsp g walnuts, chopped (optional)


Instructions

1- Preheat the oven to 170°C (340°F). Line or lightly grease an 8-inch (20 cm) round cake pan.

2- Cook the lentils until very tender, drain well, and let them cool completely.

3- Boil the sweet potato until soft, then mash until smooth and let it cool.

4- Melt the dark chocolate gently using a double boiler or microwave, stirring until smooth. Let it cool slightly.

5- Separate the eggs, placing the whites in one large bowl and the yolks in another.

6- In a blender or food processor, combine the cooked lentils, mashed sweet potato, egg yolks, honey, melted chocolate, and cocoa powder. Blend until completely smooth and creamy.

7- Beat the egg whites until stiff peaks form.

8- Gently fold the whipped egg whites into the chocolate mixture in batches, using slow, folding motions to keep as much air as possible in the batter.

9- Fold in the chopped walnuts, if using.

10- Pour the batter into the prepared pan and smooth the top.

11- Bake for about 40 minutes, or until a toothpick inserted into the center comes out clean.

12- Let the cake cool in the pan before removing. It will settle slightly as it cools.

Serve at room temperature. The texture is soft, moist, and delicately airy — like a chocolate cloud.


Nutrition facts per serving (1 slice, 100 g, 3.5 oz):

Calories 189 kcal, Fat 9.9 g, Saturated Fat 2.8 g, Carbohydrates 17.7 g, Dietary Fiber 3.5 g, Sugars 8.1 g, Protein 7.6 g, Sodium 43 mg, Calcium 32 mg, Iron 2.1 mg, Potassium 328 mg, Vitamin C 4.3 mg.


The Smarter Way to Snack

The Smarter Way to Snack

Snacks often get a bad rap.

Too many people think of snacking as “extra calories” or something that slows progress. But when done right, smart snacking can support your metabolism, stabilize energy, and improve workout performance.

The key isn’t snacking more — it’s snacking smarter.


Smart Snacking?

Long gaps between meals can backfire. When blood sugar drops too low, energy crashes, cravings spike, and the body becomes less efficient at using fuel.

Smart snacks help by:

  • Keeping blood sugar stable
  • Preventing overeating later in the day
  • Fueling workouts and recovery


How to design your smart snack?

Protein is the star: Protein requires more energy to digest than carbs or fats (a small metabolic bonus called the thermic effect of food). It also helps preserve muscle — and more muscle = higher metabolism.
Protein rich ideas: greek yogurt, hard-boiled eggs, soy products.

Pair protein with fiber: Fiber slows digestion, keeps you full longer, and prevents energy crashes. Fruit and veggies can also be part of a snack! 

Healthy fats = staying power: A little fat helps you stay satisfied and keeps hormones happy. Add mindful portions of nuts and seeds to your snacks.


Timing matters

Smart snacking isn’t random — it’s strategic. When you match the right fuel to your activity level and time of day, your body performs better.

  • Pre-workout: Protein + carbs for energy and muscle support
  • Post-workout: Protein to kick-start recovery
  • Mid-afternoon: Protein + fiber to avoid the afternoon crash

Listen to hunger cues and avoid emotional snacking. Snacks should support meals, not replace them.


The Power of Ready-to-Eat Snacks

The best snack is the one you actually HAVE WHEN HUNGER HITS.

When we’re unprepared, convenience wins — and that usually means low-nutrient foods.

So set yourself up for success:

  • Prep snacks ahead of time.
  • Always keep options in your gym bag, car, or desk.

Easy grab-and-go ideas:

  • Greek yogurt + berries
  • Apple + peanut butter
  • Hard-boiled eggs
  • Protein shake + banana
  • Pre-portioned mix with nuts and seeds
  • Edamame beans with sea salt


Train smart. Fuel smart. Feel the difference. 💪


Now it’s Your Turn 

This week, plan one smart snack per day.
Prep it, pack it, and eat it intentionally — not reactively.


Try this Roasted Edamame with Sea Sal to kick-off:

Courtesy of The Kitchn

– 2 cups (aprox. 16 oz) of frozen shelled edamame
– 2 teaspoons extra-virgin olive oil
– 1 teaspoon sea salt
– 1/2 teaspoon freshly-cracked black pepper (or 1-2 teaspoons alternate seasoning)

  1. If you have time, thaw the edamame for an hour or so in a strainer over a bowl (to catch the melting liquid) before baking. This will reduce the roasting time.
  2. Preheat the oven to 375°F.
  3. If not thawed beforehand, pour the edamame in a strainer and run under warm water for a few seconds to melt any ice crystals. Spread the edamame on a clean dish towel and pat gently with another dish towel to dry them as much as possible.
  4. In a mixing bowl, toss the edamame with the olive oil, salt, and pepper (or other seasonings).
  5. Spread the edamame in a single layer on a sheet pan and roast for 30-40 minutes. Stir every 10 minutes and watch for the edamame to begin puffing and turning golden-brown. Their color will darken, the exterior will be dry, and you’ll hear them “singing” as steam escapes from inside the bean.
  6. Remove the pan from the oven and transfer the roasted edamame to a serving bowl.


Nutritional Facts (per serving: 1/2 cup ~85 g, ~3 oz):
Calories 150, Total Fat 7.5g, Saturated Fat 1g, Trans Fat 0g, Cholesterol 0mg, Sodium 300mg, Total Carbohydrate 9g, Dietary Fiber 5g, Sugars 2g, Protein 11g, Vitamin D 0mcg, Calcium 65mg, Iron 2.2mg, Potassium 450mg


Call to Action 

Nutrition is the “hidden” part of your fitness journey. If you’re working hard in the studio but feel like your diet is holding you back, reply to this email or text us at 732-314-4086! The team at Kinetics NJ is ready to help you fine-tune your fuel so you can see the results you’ve been working for.